Internet Radio
This article describes a simple and relatively cheap way |
Internet radio types
It's not easy to precisely define what an Internet radio is, because, contrary to the traditional radio, one can create products similar to the radio experience, in various ways:
- Live program: You start like the classic FM radio station would, but instead of connecting the signal to a transmitter, you send it to the Internet.

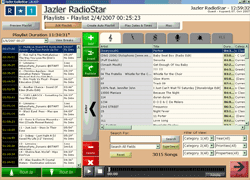
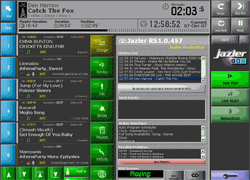
- Automated production: Most FM radios use some kind of radio automation software of their choice to organise and create their program. Sound engineers and producers record short spots (musical, voice-overs, jungles) and using the software's file lists they play their program. These automation systems, like Jazler, can as well be used for Internet radios.

- Simulcast: Many FM radio stations broadcast their program online as well. Even though, technically, this type of station is not considered to be an Internet radio, the experience of the final user is the same with that of listening to an Internet radio.

- Server-side playlist: This is another type of automation. Unlike a radio station broadcasting from a studio that produces a single continuous audio signal, an Internet radio station transmits a series of many WMA files. The server itself operates as a "radio automation" system.

- On-Demand playlist: This one is the third type of automation, where the Windows Media Player itself plays the role of the radio automation system. After the radio show is recorded and converted into WMA (Windows Media Audio) format, we create an .asx file in which we describe the order in which the files will play. The player downloads this file and starts reproducing the show in the dictated order.

Production of program content
The first and most important part of a radio station is its content, which is a live program flow that includes all the isolated elements, like the broadcaster, the music and the ads, all in order. In the traditional live radio the producer handles the program flow in real time. For instance, the producer speaks in the microphone while simultaneously synchronizing the transitions to the music and then back to the broadcaster.
Internet radio technicians and broadcasters are the ones who create the isolated program elements, but then an automation program like Jazler takes over the program mix. There are various radio automation systems, with prices that vary from 300 to more than 15.000 Euro.
In general, the automated station work flow is as follows:
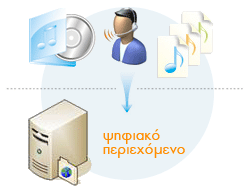
 The program parts are created.. A studio or a production station is used to record, digitise and deliver the isolated files. The studio organisation can be as simple as a microphone, a computer and the various devices, like the CD players.
The sound from the microphone and the devices are digitised on the computer.
The producer splits every section in a sound file and saves them on the automation computer, on the local LAN network.
 The playlists are created.. A playlist file is created by the automation system. The playlist contains the files, as well as the synchronisation information. In many cases, the sections of the program play sequentially, however a section can also start playing at a specific time, for example a news section can be planned to start exactly at 14:00 pm.
A playlist can often be created on a computer different than the computer that runs the automation program. You could for instance create the playlists on an office desktop and the automation computer could access the file through the local LAN.
 The automation program runs the playlist.
The isolated files are reproduced by the automation program according to instructions that are contained in the playlist file and the final audio signal is driven to the sound card. In the case of Internet radios, the same computer can also play the role of the digitizer, so the signal is lead to the Windows Media Encoder instead of being driven out of the sound card.
Encoder Settings
The audio signal is encoded to a stream using the Windows Media Encoder. The steps to get the encoding procedure started have as follows:
- On Windows Media Encoder, select New Session.
- On the New Session window, select Broadcast a live event.
- On the New Session Wizard window, insert the following information:
- Device Options.
Only tick the Audio check box and select the suitable sound card.
- Broadcast Method.
Select Push to a Windows Media server (the connection is initiated by the encoder)
- Server and Publishing Point.
Insert the information that your streaming provider has provided you with when you are asked for your Server name and Publishing point.
- Encoding options.
Select one or multiple bitrates. For our example here we choose: 70 Kbps and 24 Kbps. When a user connects to your stream, the server will automatically respond by sending the stream that is more suitable depenfding on the user's Internet connection speed. Pease take into consideration that the bandwidth between the encoding computer and the server has to be high enough so that it would be able to tackle both channels.
- Archive File.
This option only makes sense when what we want is to keep a record of the station's program.
- Display Information.
Insert the information that you want to appear on Windows Media Player when the user connects to your stream.
- Device Options.
- Press Finish to close the Wizard.
- Save these settings in a .wme file, by choosing File, Save from the menu.
- Start the Windows Media Encoder by clicking Start Encoding.
- The stream channel that is created is automatically transferred to the server for your users to listen to.
Volume Control
In case you are facing problems with the volume of the audio you are broadcasting, try the following steps:
- Open Volume Control by clicking on its icon on the taskbar. Make sure that the Line In is muted.
- From the Options menu select Properties.
- From Properties select Recording and click OK.
- If your computer is used to encode the signal of the Line In from your console, then select the Line In to record. But if your computer is also the one who produces the station's program, then select Stereo Mix or Wave.
- Adjust the volume so that it does not exceed the levels in yellow on the Windows Media Encoder.
Live Streaming Hosting
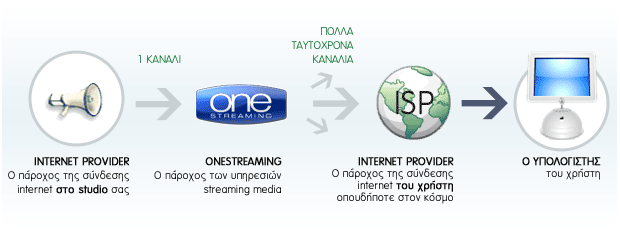
In essence we are using two ISP providers: the first one provides us with the DSL service that connects the local LAN network to the Internet, the second one provides the streaming media services.

In theory, you could buy a server and host your live streaming, but you'd need advanced knowledge and networking skills to be able to form and maintain the service. You would also need a fast backbone connection to handle the hundreds or thousands of simultaneous connections. The streaming provider tackles all these issues so that you can focus on your content creation.
Live Streaming Reproduction
Once all the required settings are configured and all the necessary tests are completed, you are ready to start broadcasting live online and have users connect to your stream:
- Open Windows Media Player on an other computer.
- From the File menu select Open url and type in the address that your streaming provider has provided you with, for example http://live.onestreaming.com/myinternetradio
You can also try the Windows Media Player, Winamp etc metafiles that we provide you with.
It's a good idea to regularly check your live stream so that you have an idea of how the sound reaches your final users. If you are unable to connect, you will have to check your steps again, one by one, to make sure that everything is in order. You can check the power supply at different parts of the chain to decide where exactly the problem lies.
If your stream is frequently interrupted, make sure that you have enough bandwidth available towards your DSL provider. If the problem insists, contact your Internet provider.
- Check out every Greek radio broadcasting online: E-Radio, The Hellenic Radio Portal www.e-radio.gr
- Choose the right automation program: Jazler, Radio Automation Software www.jazler.com
- Broadcast your station online: OneStreaming, the No1 Streaming Provider www.onestreaming.com

